🗊Презентация Introduction to Java Applications. Chapter 2

Категория: Информатика
Нажмите для полного просмотра!
Introduction to Java Applications. Chapter 2, слайд №1Introduction to Java Applications. Chapter 2, слайд №2Introduction to Java Applications. Chapter 2, слайд №3Introduction to Java Applications. Chapter 2, слайд №4Introduction to Java Applications. Chapter 2, слайд №5Introduction to Java Applications. Chapter 2, слайд №6Introduction to Java Applications. Chapter 2, слайд №7Introduction to Java Applications. Chapter 2, слайд №8Introduction to Java Applications. Chapter 2, слайд №9Introduction to Java Applications. Chapter 2, слайд №10Introduction to Java Applications. Chapter 2, слайд №11Introduction to Java Applications. Chapter 2, слайд №12Introduction to Java Applications. Chapter 2, слайд №13Introduction to Java Applications. Chapter 2, слайд №14Introduction to Java Applications. Chapter 2, слайд №15Introduction to Java Applications. Chapter 2, слайд №16Introduction to Java Applications. Chapter 2, слайд №17Introduction to Java Applications. Chapter 2, слайд №18Introduction to Java Applications. Chapter 2, слайд №19Introduction to Java Applications. Chapter 2, слайд №20Introduction to Java Applications. Chapter 2, слайд №21Introduction to Java Applications. Chapter 2, слайд №22Introduction to Java Applications. Chapter 2, слайд №23Introduction to Java Applications. Chapter 2, слайд №24Introduction to Java Applications. Chapter 2, слайд №25Introduction to Java Applications. Chapter 2, слайд №26Introduction to Java Applications. Chapter 2, слайд №27Introduction to Java Applications. Chapter 2, слайд №28Introduction to Java Applications. Chapter 2, слайд №29Introduction to Java Applications. Chapter 2, слайд №30Introduction to Java Applications. Chapter 2, слайд №31Introduction to Java Applications. Chapter 2, слайд №32Introduction to Java Applications. Chapter 2, слайд №33Introduction to Java Applications. Chapter 2, слайд №34Introduction to Java Applications. Chapter 2, слайд №35Introduction to Java Applications. Chapter 2, слайд №36Introduction to Java Applications. Chapter 2, слайд №37Introduction to Java Applications. Chapter 2, слайд №38Introduction to Java Applications. Chapter 2, слайд №39Introduction to Java Applications. Chapter 2, слайд №40Introduction to Java Applications. Chapter 2, слайд №41Introduction to Java Applications. Chapter 2, слайд №42Introduction to Java Applications. Chapter 2, слайд №43Introduction to Java Applications. Chapter 2, слайд №44Introduction to Java Applications. Chapter 2, слайд №45Introduction to Java Applications. Chapter 2, слайд №46Introduction to Java Applications. Chapter 2, слайд №47Introduction to Java Applications. Chapter 2, слайд №48Introduction to Java Applications. Chapter 2, слайд №49Introduction to Java Applications. Chapter 2, слайд №50Introduction to Java Applications. Chapter 2, слайд №51Introduction to Java Applications. Chapter 2, слайд №52Introduction to Java Applications. Chapter 2, слайд №53Introduction to Java Applications. Chapter 2, слайд №54Introduction to Java Applications. Chapter 2, слайд №55Introduction to Java Applications. Chapter 2, слайд №56Introduction to Java Applications. Chapter 2, слайд №57Introduction to Java Applications. Chapter 2, слайд №58Introduction to Java Applications. Chapter 2, слайд №59Introduction to Java Applications. Chapter 2, слайд №60Introduction to Java Applications. Chapter 2, слайд №61Introduction to Java Applications. Chapter 2, слайд №62Introduction to Java Applications. Chapter 2, слайд №63Introduction to Java Applications. Chapter 2, слайд №64Introduction to Java Applications. Chapter 2, слайд №65Introduction to Java Applications. Chapter 2, слайд №66Introduction to Java Applications. Chapter 2, слайд №67Introduction to Java Applications. Chapter 2, слайд №68Introduction to Java Applications. Chapter 2, слайд №69Introduction to Java Applications. Chapter 2, слайд №70Introduction to Java Applications. Chapter 2, слайд №71Introduction to Java Applications. Chapter 2, слайд №72Introduction to Java Applications. Chapter 2, слайд №73Introduction to Java Applications. Chapter 2, слайд №74Introduction to Java Applications. Chapter 2, слайд №75Introduction to Java Applications. Chapter 2, слайд №76Introduction to Java Applications. Chapter 2, слайд №77Introduction to Java Applications. Chapter 2, слайд №78Introduction to Java Applications. Chapter 2, слайд №79Introduction to Java Applications. Chapter 2, слайд №80Introduction to Java Applications. Chapter 2, слайд №81

Содержание

Вы можете ознакомиться и скачать презентацию на тему Introduction to Java Applications. Chapter 2. Доклад-сообщение содержит 81 слайдов. Презентации для любого класса можно скачать бесплатно. Если материал и наш сайт презентаций Mypresentation Вам понравились – поделитесь им с друзьями с помощью социальных кнопок и добавьте в закладки в своем браузере.
Слайды и текст этой презентации


Слайд 1


Java™ How to Program, 9/e
Описание слайда:
Java™ How to Program, 9/e

Слайд 2


Introduction to Java Applications. Chapter 2, слайд №2
Описание слайда:

Слайд 3


Introduction to Java Applications. Chapter 2, слайд №3
Описание слайда:

Слайд 4


Java application programming

Java application programming

Use tools from the JDK to compile and run programs.

Videos at www.deitel.com/books/jhtp9/ 

Help you get started with Eclipse and NetBeans integrated development environments.
Описание слайда:
Java application programming Java application programming Use tools from the JDK to compile and run programs. Videos at www.deitel.com/books/jhtp9/ Help you get started with Eclipse and NetBeans integrated development environments.

Слайд 5


Java application 
Java application 
A computer program that executes when you use the java command to launch the Java Virtual Machine (JVM). 
Sample program in Fig. 2.1 displays a line of text.
Описание слайда:
Java application Java application A computer program that executes when you use the java command to launch the Java Virtual Machine (JVM). Sample program in Fig. 2.1 displays a line of text.

Слайд 6


Introduction to Java Applications. Chapter 2, слайд №6
Описание слайда:

Слайд 7


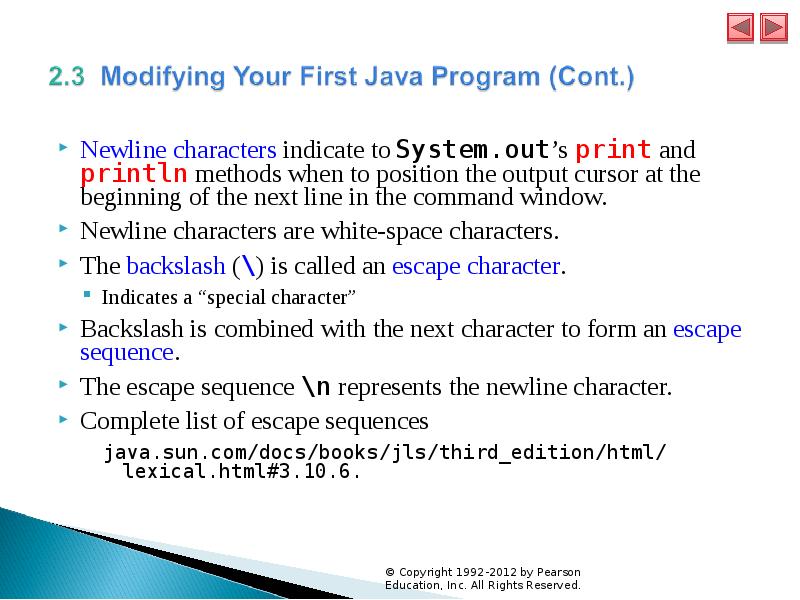
Comments
Comments
	// Fig. 2.1: Welcome1.java
// indicates that the line is a comment. 
Used to document programs and improve their readability.
Compiler ignores comments.
A comment that begins with // is an end-of-line comment—it terminates at the end of the line on which it appears. 
Traditional comment, can be spread over several lines as in
	/* This is a traditional comment. It
   can be split over multiple lines */
This type of comment begins with /* and ends with */. 
All text between the delimiters is ignored by the compiler.
Описание слайда:
Comments Comments // Fig. 2.1: Welcome1.java // indicates that the line is a comment. Used to document programs and improve their readability. Compiler ignores comments. A comment that begins with // is an end-of-line comment—it terminates at the end of the line on which it appears. Traditional comment, can be spread over several lines as in /* This is a traditional comment. It can be split over multiple lines */ This type of comment begins with /* and ends with */. All text between the delimiters is ignored by the compiler.

Слайд 8


Javadoc comments 
Javadoc comments 
Delimited by /** and */. 
All text between the Javadoc comment delimiters is ignored by the compiler. 
Enable you to embed program documentation directly in your programs. 
The javadoc utility program (Appendix M) reads Javadoc comments and uses them to prepare your program’s documentation in HTML format.
Описание слайда:
Javadoc comments Javadoc comments Delimited by /** and */. All text between the Javadoc comment delimiters is ignored by the compiler. Enable you to embed program documentation directly in your programs. The javadoc utility program (Appendix M) reads Javadoc comments and uses them to prepare your program’s documentation in HTML format.

Слайд 9


Introduction to Java Applications. Chapter 2, слайд №9
Описание слайда:

Слайд 10


Introduction to Java Applications. Chapter 2, слайд №10
Описание слайда:

Слайд 11


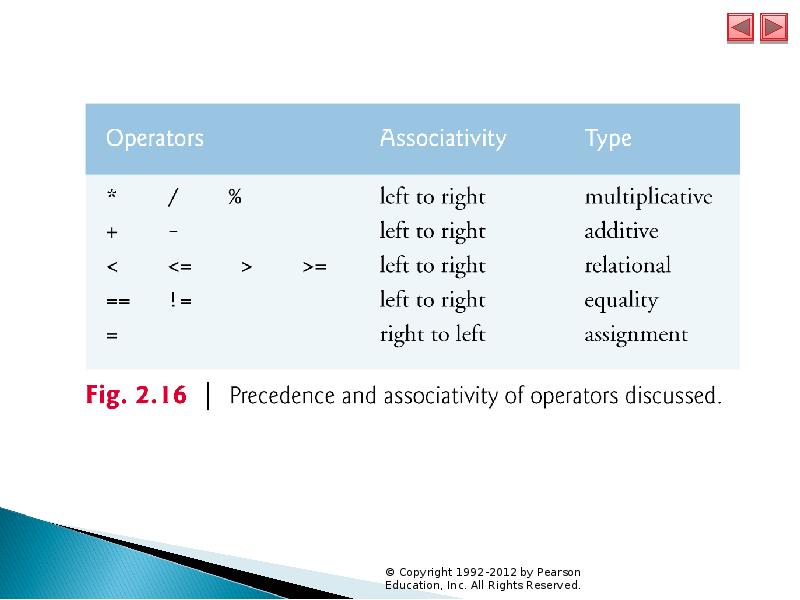
Blank lines and space characters 
Make programs easier to read. 
Blank lines, spaces and tabs are known as white space (or whitespace). 
White space is ignored by the compiler.
Описание слайда:
Blank lines and space characters Blank lines and space characters Make programs easier to read. Blank lines, spaces and tabs are known as white space (or whitespace). White space is ignored by the compiler.

Слайд 12


Introduction to Java Applications. Chapter 2, слайд №12
Описание слайда:

Слайд 13


Class declaration
Class declaration
	public class Welcome1 
Every Java program consists of at least one class that you define. 
class keyword introduces a class declaration and is immediately followed by the class name.
Keywords (Appendix C) are reserved for use by Java and are always spelled with all lowercase letters.
Описание слайда:
Class declaration Class declaration public class Welcome1 Every Java program consists of at least one class that you define. class keyword introduces a class declaration and is immediately followed by the class name. Keywords (Appendix C) are reserved for use by Java and are always spelled with all lowercase letters.

Слайд 14


Class names
Class names
By convention, begin with a capital letter and capitalize the first letter of each word they include (e.g., SampleClassName). 
A class name is an identifier—a series of characters consisting of letters, digits, underscores (_) and dollar signs ($) that does not begin with a digit and does not contain spaces. 
Java is case sensitive—uppercase and lowercase letters are distinct—so a1 and A1 are different (but both valid) identifiers.
Описание слайда:
Class names Class names By convention, begin with a capital letter and capitalize the first letter of each word they include (e.g., SampleClassName). A class name is an identifier—a series of characters consisting of letters, digits, underscores (_) and dollar signs ($) that does not begin with a digit and does not contain spaces. Java is case sensitive—uppercase and lowercase letters are distinct—so a1 and A1 are different (but both valid) identifiers.

Слайд 15


Introduction to Java Applications. Chapter 2, слайд №15
Описание слайда:

Слайд 16


Braces
Braces
A left brace, {, begins the body of every class declaration. 
A corresponding right brace, }, must end each class declaration. 
Code between braces should be indented.
This indentation is one of the spacing conventions mentioned earlier.
Описание слайда:
Braces Braces A left brace, {, begins the body of every class declaration. A corresponding right brace, }, must end each class declaration. Code between braces should be indented. This indentation is one of the spacing conventions mentioned earlier.

Слайд 17


Introduction to Java Applications. Chapter 2, слайд №17
Описание слайда:

Слайд 18


Introduction to Java Applications. Chapter 2, слайд №18
Описание слайда:

Слайд 19


Introduction to Java Applications. Chapter 2, слайд №19
Описание слайда:

Слайд 20


Introduction to Java Applications. Chapter 2, слайд №20
Описание слайда:

Слайд 21


Declaring the main Method
	public static void main( String[] args )
Starting point of every Java application. 
Parentheses after the identifier main indicate that it’s a program building block called a method. 
Java class declarations normally contain one or more methods. 
main must be defined as shown; otherwise, the JVM will not execute the application. 
Methods perform tasks and can return information when they complete their tasks. 
Keyword void indicates that this method will not return any information.
Описание слайда:
Declaring the main Method Declaring the main Method public static void main( String[] args ) Starting point of every Java application. Parentheses after the identifier main indicate that it’s a program building block called a method. Java class declarations normally contain one or more methods. main must be defined as shown; otherwise, the JVM will not execute the application. Methods perform tasks and can return information when they complete their tasks. Keyword void indicates that this method will not return any information.

Слайд 22


Body of the method declaration 
Enclosed in left and right braces.
Statement
	System.out.println("Welcome to Java Programming!");
Instructs the computer to perform an action
Print the string of characters contained between the double quotation marks. 
A string is sometimes called a character string or a string literal. 
White-space characters in strings are not ignored by the compiler. 
Strings cannot span multiple lines of code.
Описание слайда:
Body of the method declaration Body of the method declaration Enclosed in left and right braces. Statement System.out.println("Welcome to Java Programming!"); Instructs the computer to perform an action Print the string of characters contained between the double quotation marks. A string is sometimes called a character string or a string literal. White-space characters in strings are not ignored by the compiler. Strings cannot span multiple lines of code.

Слайд 23


Introduction to Java Applications. Chapter 2, слайд №23
Описание слайда:

Слайд 24


System.out object
System.out object
Standard output object. 
Allows Java applications to display strings in the command window from which the Java application executes. 
System.out.println method 
Displays (or prints) a line of text in the command window. 
The string in the parentheses the argument to the method. 
Positions the output cursor at the beginning of the next line in the command window.
Most statements end with a semicolon.
Описание слайда:
System.out object System.out object Standard output object. Allows Java applications to display strings in the command window from which the Java application executes. System.out.println method Displays (or prints) a line of text in the command window. The string in the parentheses the argument to the method. Positions the output cursor at the beginning of the next line in the command window. Most statements end with a semicolon.

Слайд 25


Introduction to Java Applications. Chapter 2, слайд №25
Описание слайда:

Слайд 26


Introduction to Java Applications. Chapter 2, слайд №26
Описание слайда:

Слайд 27


Compiling and Executing Your First Java Application
Open a command window and change to the directory where the program is stored. 
Many operating systems use the command cd to change directories. 
To compile the program, type
	javac Welcome1.java
If the program contains no syntax errors, preceding command creates a.class file (known as the class file) containing the platform-independent Java bytecodes that represent the application. 
When we use the java command to execute the application on a given platform, these bytecodes will be translated by the JVM into instructions that are understood by the underlying operating system.
Описание слайда:
Compiling and Executing Your First Java Application Compiling and Executing Your First Java Application Open a command window and change to the directory where the program is stored. Many operating systems use the command cd to change directories. To compile the program, type javac Welcome1.java If the program contains no syntax errors, preceding command creates a.class file (known as the class file) containing the platform-independent Java bytecodes that represent the application. When we use the java command to execute the application on a given platform, these bytecodes will be translated by the JVM into instructions that are understood by the underlying operating system.

Слайд 28


Introduction to Java Applications. Chapter 2, слайд №28
Описание слайда:

Слайд 29


Introduction to Java Applications. Chapter 2, слайд №29
Описание слайда:

Слайд 30


Introduction to Java Applications. Chapter 2, слайд №30
Описание слайда:

Слайд 31


To execute the program, type java Welcome1. 
Launches the JVM, which loads the .class file for class Welcome1. 
Note that the .class file-name extension is omitted from the preceding command; otherwise, the JVM will not execute the program. 
The JVM calls method main to execute the program.
Описание слайда:
To execute the program, type java Welcome1. To execute the program, type java Welcome1. Launches the JVM, which loads the .class file for class Welcome1. Note that the .class file-name extension is omitted from the preceding command; otherwise, the JVM will not execute the program. The JVM calls method main to execute the program.

Слайд 32


Introduction to Java Applications. Chapter 2, слайд №32
Описание слайда:

Слайд 33


Introduction to Java Applications. Chapter 2, слайд №33
Описание слайда:

Слайд 34


Class Welcome2, shown in Fig. 2.3, uses two statements to produce the same output as that shown in Fig. 2.1. 
New and key features in each code listing are highlighted. 
System.out’s method print displays a string. 
Unlike println, print does not position the output cursor at the beginning of the next line in the command window.
The next character the program displays will appear immediately after the last character that print displays.
Описание слайда:
Class Welcome2, shown in Fig. 2.3, uses two statements to produce the same output as that shown in Fig. 2.1. Class Welcome2, shown in Fig. 2.3, uses two statements to produce the same output as that shown in Fig. 2.1. New and key features in each code listing are highlighted. System.out’s method print displays a string. Unlike println, print does not position the output cursor at the beginning of the next line in the command window. The next character the program displays will appear immediately after the last character that print displays.

Слайд 35


Introduction to Java Applications. Chapter 2, слайд №35
Описание слайда:

Слайд 36


Newline characters indicate to System.out’s print and println methods when to position the output cursor at the beginning of the next line in the command window. 
Newline characters are white-space characters. 
The backslash (\) is called an escape character. 
Indicates a “special character” 
Backslash is combined with the next character to form an escape sequence. 
The escape sequence \n represents the newline character. 
Complete list of escape sequences
java.sun.com/docs/books/jls/third_edition/html/
lexical.html#3.10.6.
Описание слайда:
Newline characters indicate to System.out’s print and println methods when to position the output cursor at the beginning of the next line in the command window. Newline characters indicate to System.out’s print and println methods when to position the output cursor at the beginning of the next line in the command window. Newline characters are white-space characters. The backslash (\) is called an escape character. Indicates a “special character” Backslash is combined with the next character to form an escape sequence. The escape sequence \n represents the newline character. Complete list of escape sequences java.sun.com/docs/books/jls/third_edition/html/ lexical.html#3.10.6.

Слайд 37


Introduction to Java Applications. Chapter 2, слайд №37
Описание слайда:

Слайд 38


Introduction to Java Applications. Chapter 2, слайд №38
Описание слайда:

Слайд 39


System.out.printf method 
f means “formatted”
displays formatted data
Multiple method arguments are placed in a comma-separated list. 
Java allows large statements to be split over many lines. 
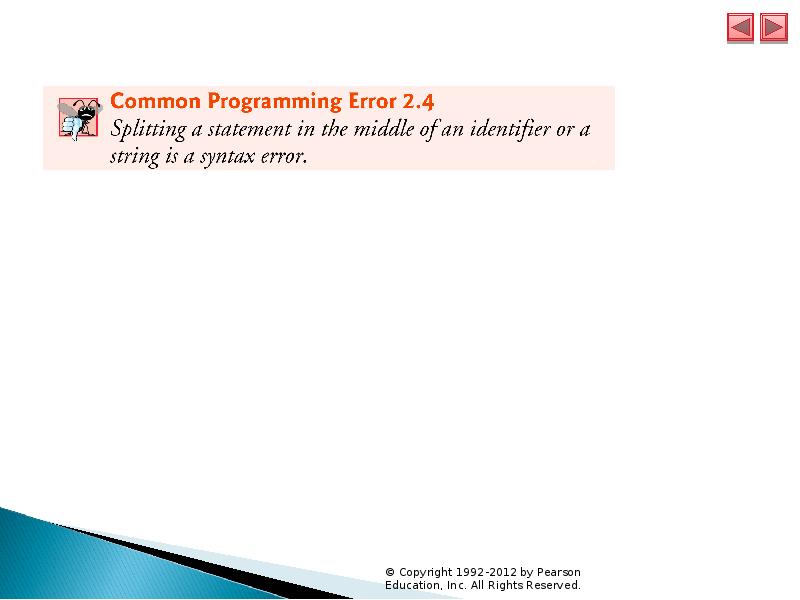
Cannot split a statement in the middle of an identifier or string.
Method printf’s first argument is a format string
May consist of fixed text and format specifiers.
Fixed text is output as it would be by print or println. 
Each format specifier is a placeholder for a value and specifies the type of data to output.
Format specifiers begin with a percent sign (%) and are followed by a character that represents the data type. 
Format specifier %s is a placeholder for a string.
Описание слайда:
System.out.printf method System.out.printf method f means “formatted” displays formatted data Multiple method arguments are placed in a comma-separated list. Java allows large statements to be split over many lines. Cannot split a statement in the middle of an identifier or string. Method printf’s first argument is a format string May consist of fixed text and format specifiers. Fixed text is output as it would be by print or println. Each format specifier is a placeholder for a value and specifies the type of data to output. Format specifiers begin with a percent sign (%) and are followed by a character that represents the data type. Format specifier %s is a placeholder for a string.

Слайд 40


Introduction to Java Applications. Chapter 2, слайд №40
Описание слайда:

Слайд 41


Introduction to Java Applications. Chapter 2, слайд №41
Описание слайда:

Слайд 42


Introduction to Java Applications. Chapter 2, слайд №42
Описание слайда:

Слайд 43


Integers 
Integers 
Whole numbers, like –22, 7, 0 and 1024)
Programs remember numbers and other data in the computer’s memory and access that data through program elements called variables. 
The program of Fig. 2.7 demonstrates these concepts.
Описание слайда:
Integers Integers Whole numbers, like –22, 7, 0 and 1024) Programs remember numbers and other data in the computer’s memory and access that data through program elements called variables. The program of Fig. 2.7 demonstrates these concepts.

Слайд 44


Introduction to Java Applications. Chapter 2, слайд №44
Описание слайда:

Слайд 45


Introduction to Java Applications. Chapter 2, слайд №45
Описание слайда:

Слайд 46


import declaration 
import declaration 
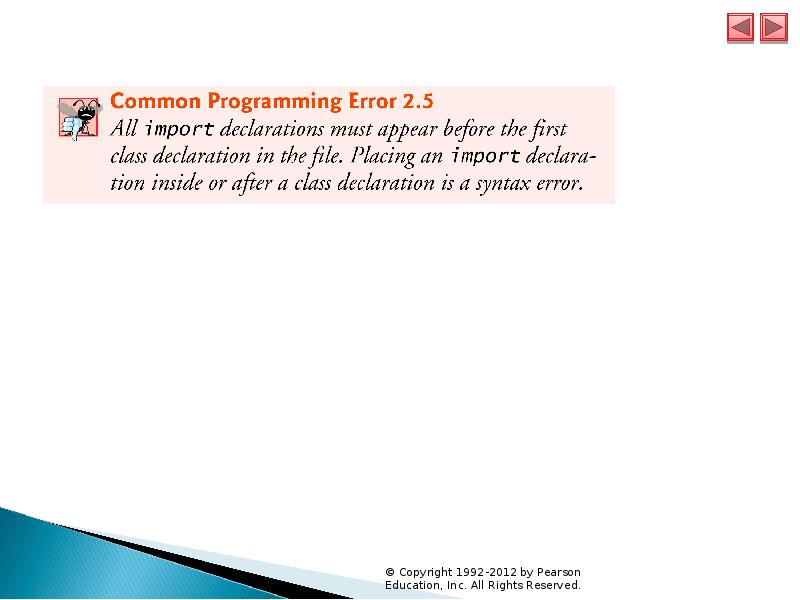
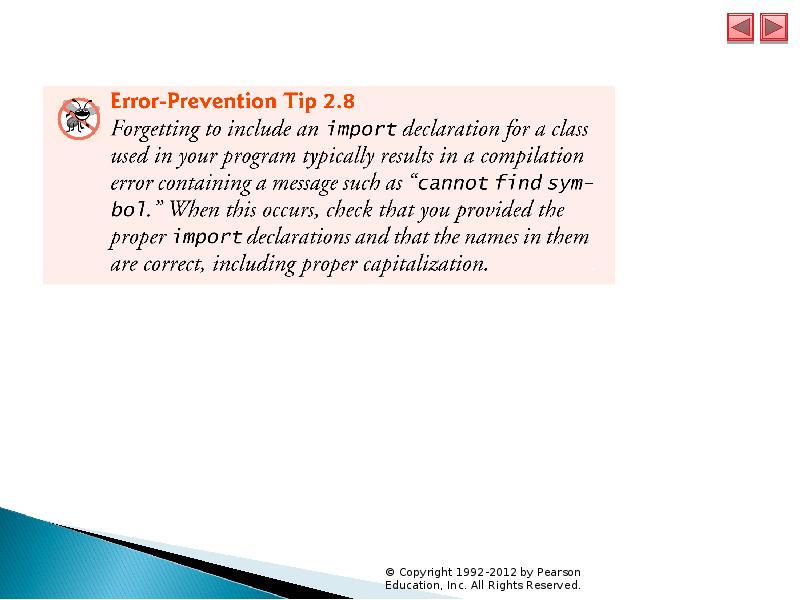
Helps the compiler locate a class that is used in this program. 
Rich set of predefined classes that you can reuse rather than “reinventing the wheel.” 
Classes are grouped into packages—named groups of related classes—and are collectively referred to as the Java class library, or the Java Application Programming Interface (Java API). 
You use import declarations to identify the predefined classes used in a Java program.
Описание слайда:
import declaration import declaration Helps the compiler locate a class that is used in this program. Rich set of predefined classes that you can reuse rather than “reinventing the wheel.” Classes are grouped into packages—named groups of related classes—and are collectively referred to as the Java class library, or the Java Application Programming Interface (Java API). You use import declarations to identify the predefined classes used in a Java program.

Слайд 47


Introduction to Java Applications. Chapter 2, слайд №47
Описание слайда:

Слайд 48


Introduction to Java Applications. Chapter 2, слайд №48
Описание слайда:

Слайд 49


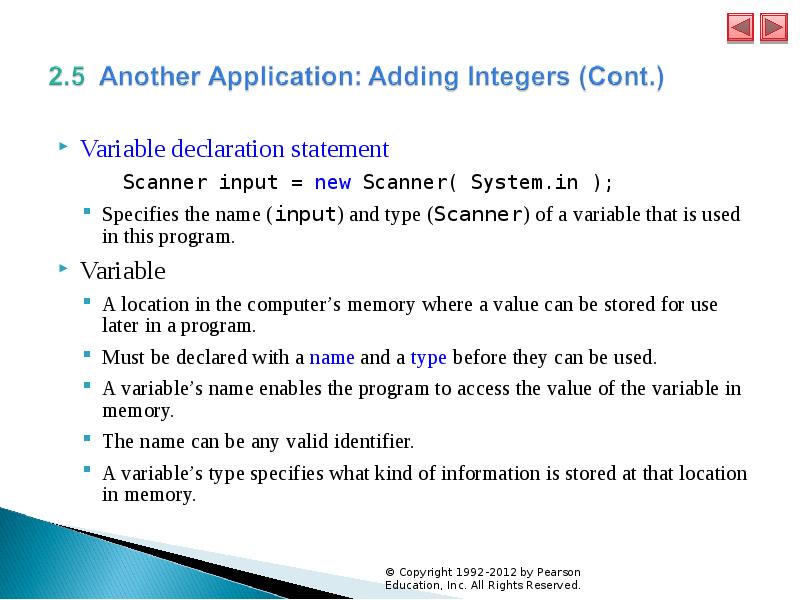
Variable declaration statement
	Scanner input = new Scanner( System.in );
Specifies the name (input) and type (Scanner) of a variable that is used in this program. 
Variable 
A location in the computer’s memory where a value can be stored for use later in a program. 
Must be declared with a name and a type before they can be used. 
A variable’s name enables the program to access the value of the variable in memory. 
The name can be any valid identifier. 
A variable’s type specifies what kind of information is stored at that location in memory.
Описание слайда:
Variable declaration statement Variable declaration statement Scanner input = new Scanner( System.in ); Specifies the name (input) and type (Scanner) of a variable that is used in this program. Variable A location in the computer’s memory where a value can be stored for use later in a program. Must be declared with a name and a type before they can be used. A variable’s name enables the program to access the value of the variable in memory. The name can be any valid identifier. A variable’s type specifies what kind of information is stored at that location in memory.

Слайд 50


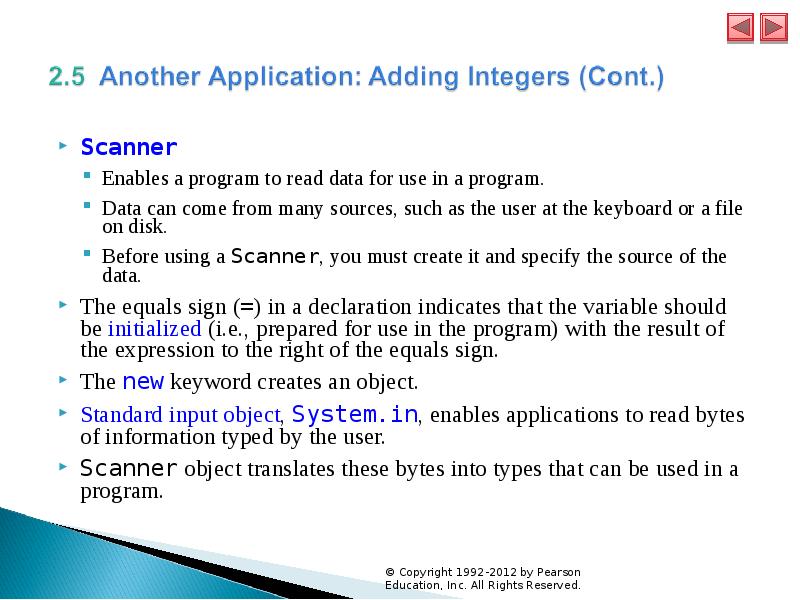
Scanner 
Scanner 
Enables a program to read data for use in a program. 
Data can come from many sources, such as the user at the keyboard or a file on disk. 
Before using a Scanner, you must create it and specify the source of the data. 
The equals sign (=) in a declaration indicates that the variable should be initialized (i.e., prepared for use in the program) with the result of the expression to the right of the equals sign. 
The new keyword creates an object.
Standard input object, System.in, enables applications to read bytes of information typed by the user. 
Scanner object translates these bytes into types that can be used in a program.
Описание слайда:
Scanner Scanner Enables a program to read data for use in a program. Data can come from many sources, such as the user at the keyboard or a file on disk. Before using a Scanner, you must create it and specify the source of the data. The equals sign (=) in a declaration indicates that the variable should be initialized (i.e., prepared for use in the program) with the result of the expression to the right of the equals sign. The new keyword creates an object. Standard input object, System.in, enables applications to read bytes of information typed by the user. Scanner object translates these bytes into types that can be used in a program.

Слайд 51


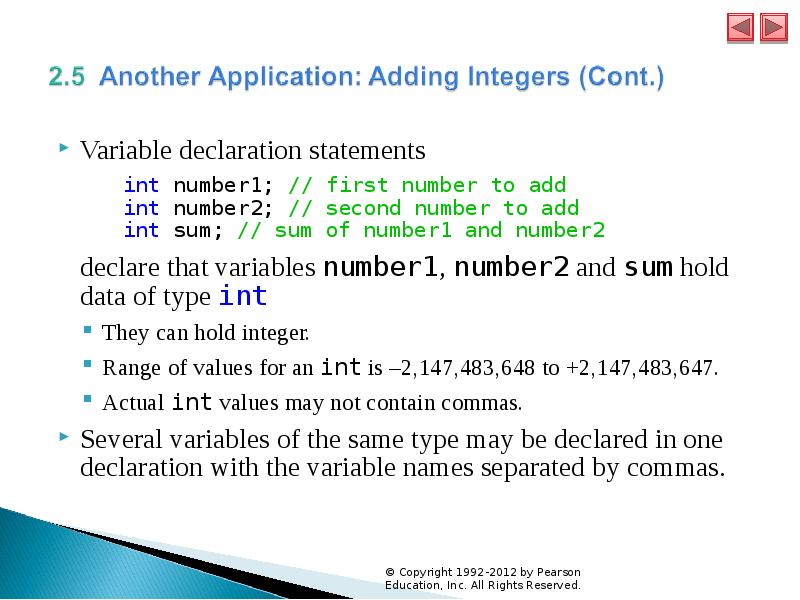
Variable declaration statements 
	int number1; // first number to add
int number2; // second number to add
int sum; // sum of number1 and number2
	declare that variables number1, number2 and sum hold data of type int
They can hold integer. 
Range of values for an int is –2,147,483,648 to +2,147,483,647. 
Actual int values may not contain commas. 
Several variables of the same type may be declared in one declaration with the variable names separated by commas.
Описание слайда:
Variable declaration statements Variable declaration statements int number1; // first number to add int number2; // second number to add int sum; // sum of number1 and number2 declare that variables number1, number2 and sum hold data of type int They can hold integer. Range of values for an int is –2,147,483,648 to +2,147,483,647. Actual int values may not contain commas. Several variables of the same type may be declared in one declaration with the variable names separated by commas.

Слайд 52


Introduction to Java Applications. Chapter 2, слайд №52
Описание слайда:

Слайд 53


Introduction to Java Applications. Chapter 2, слайд №53
Описание слайда:

Слайд 54


Introduction to Java Applications. Chapter 2, слайд №54
Описание слайда:

Слайд 55


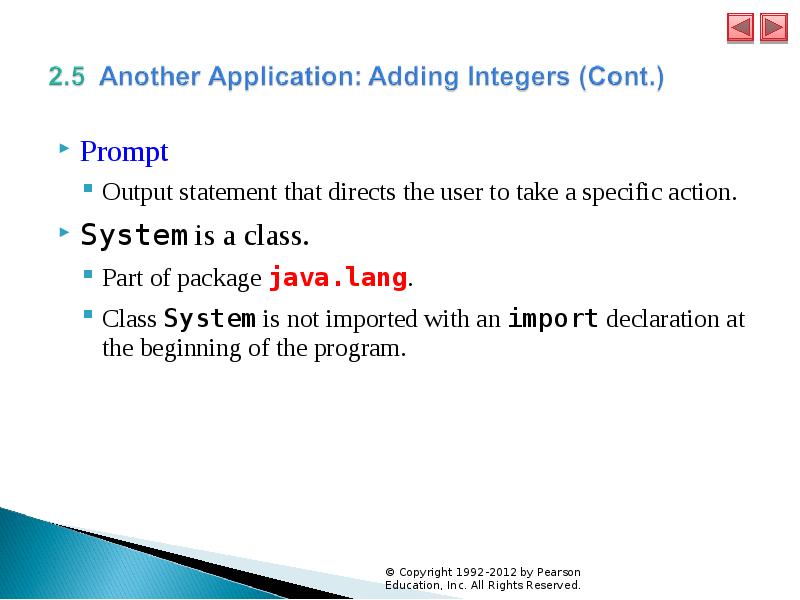
Prompt 
Prompt 
Output statement that directs the user to take a specific action. 
System is a class. 
Part of package java.lang. 
Class System is not imported with an import declaration at the beginning of the program.
Описание слайда:
Prompt Prompt Output statement that directs the user to take a specific action. System is a class. Part of package java.lang. Class System is not imported with an import declaration at the beginning of the program.

Слайд 56


Introduction to Java Applications. Chapter 2, слайд №56
Описание слайда:

Слайд 57


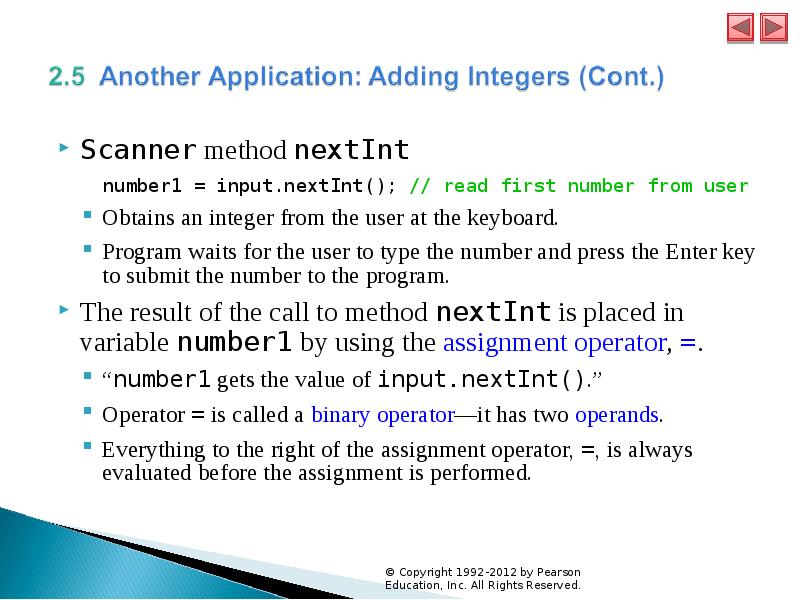
Scanner method nextInt 
number1 = input.nextInt(); // read first number from user
Obtains an integer from the user at the keyboard. 
Program waits for the user to type the number and press the Enter key to submit the number to the program. 
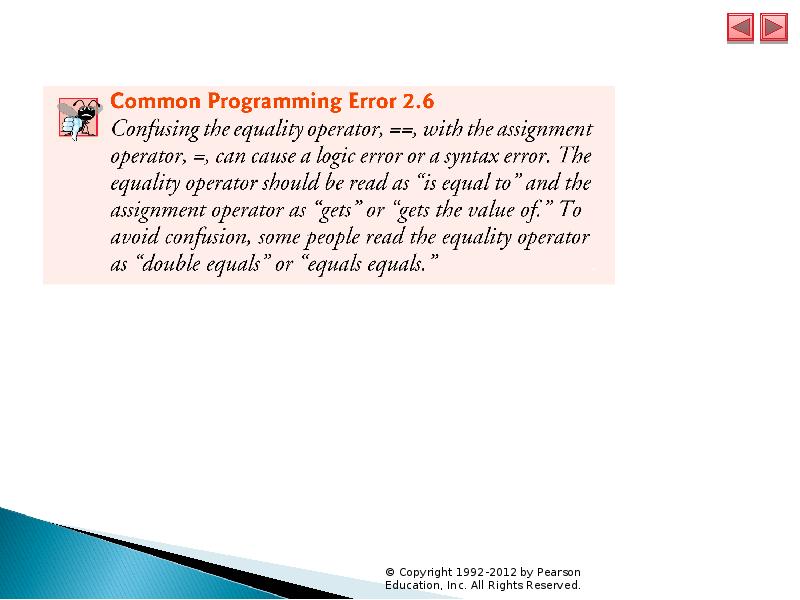
The result of the call to method nextInt is placed in variable number1 by using the assignment operator, =. 
“number1 gets the value of input.nextInt().” 
Operator = is called a binary operator—it has two operands.
Everything to the right of the assignment operator, =, is always evaluated before the assignment is performed.
Описание слайда:
Scanner method nextInt Scanner method nextInt number1 = input.nextInt(); // read first number from user Obtains an integer from the user at the keyboard. Program waits for the user to type the number and press the Enter key to submit the number to the program. The result of the call to method nextInt is placed in variable number1 by using the assignment operator, =. “number1 gets the value of input.nextInt().” Operator = is called a binary operator—it has two operands. Everything to the right of the assignment operator, =, is always evaluated before the assignment is performed.

Слайд 58


Introduction to Java Applications. Chapter 2, слайд №58
Описание слайда:

Слайд 59


Arithmetic
Arithmetic
sum = number1 + number2; // add numbers
Assignment statement that calculates the sum of the variables number1 and number2 then assigns the result to variable sum by using the assignment operator, =. 
“sum gets the value of number1 + number2.” 
In general, calculations are performed in assignment statements.
Portions of statements that contain calculations are called expressions. 
An expression is any portion of a statement that has a value associated with it.
Описание слайда:
Arithmetic Arithmetic sum = number1 + number2; // add numbers Assignment statement that calculates the sum of the variables number1 and number2 then assigns the result to variable sum by using the assignment operator, =. “sum gets the value of number1 + number2.” In general, calculations are performed in assignment statements. Portions of statements that contain calculations are called expressions. An expression is any portion of a statement that has a value associated with it.

Слайд 60


Integer formatted output
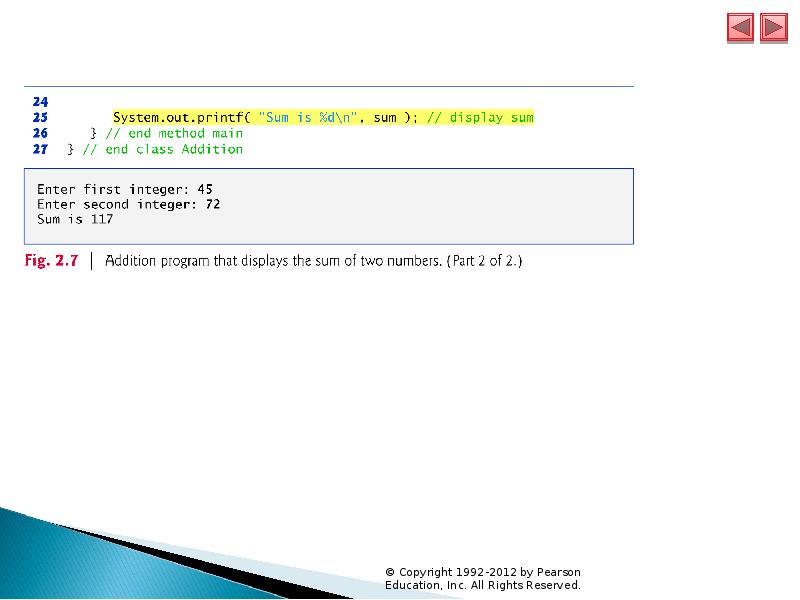
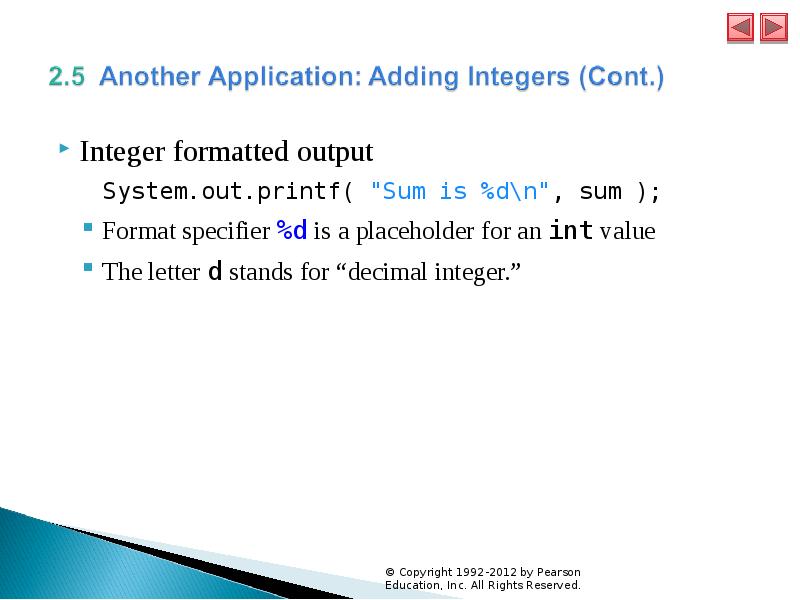
System.out.printf( "Sum is %d\n", sum ); 
Format specifier %d is a placeholder for an int value
The letter d stands for “decimal integer.”
Описание слайда:
Integer formatted output Integer formatted output System.out.printf( "Sum is %d\n", sum ); Format specifier %d is a placeholder for an int value The letter d stands for “decimal integer.”

Слайд 61


Variables
Variables
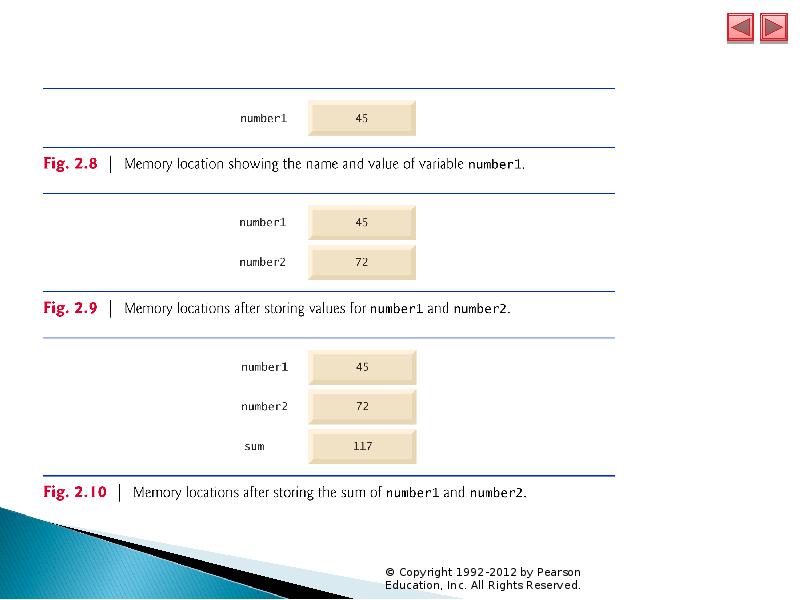
Every variable has a name, a type, a size (in bytes) and a value.
When a new value is placed into a variable, the new value replaces the previous value (if any) 
The previous value is lost.
Описание слайда:
Variables Variables Every variable has a name, a type, a size (in bytes) and a value. When a new value is placed into a variable, the new value replaces the previous value (if any) The previous value is lost.

Слайд 62


Introduction to Java Applications. Chapter 2, слайд №62
Описание слайда:

Слайд 63


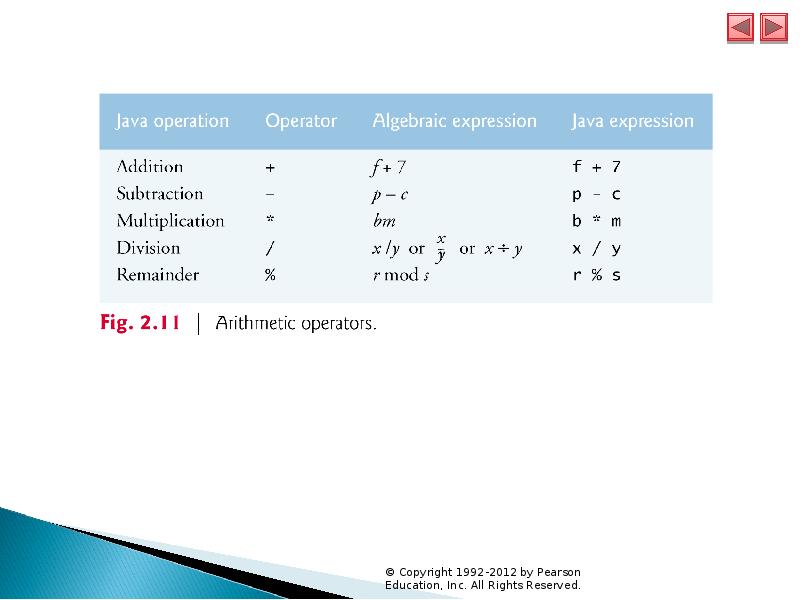
Arithmetic operators are summarized in Fig. 2.11. 
The asterisk (*) indicates multiplication
The percent sign (%) is the remainder operator
The arithmetic operators are binary operators because they each operate on two operands. 
Integer division yields an integer quotient.
Any fractional part in integer division is simply discarded (i.e., truncated)—no rounding occurs.
The remainder operator, %, yields the remainder after division.
Описание слайда:
Arithmetic operators are summarized in Fig. 2.11. Arithmetic operators are summarized in Fig. 2.11. The asterisk (*) indicates multiplication The percent sign (%) is the remainder operator The arithmetic operators are binary operators because they each operate on two operands. Integer division yields an integer quotient. Any fractional part in integer division is simply discarded (i.e., truncated)—no rounding occurs. The remainder operator, %, yields the remainder after division.

Слайд 64


Introduction to Java Applications. Chapter 2, слайд №64
Описание слайда:

Слайд 65


Arithmetic expressions in Java must be written in straight-line form to facilitate entering programs into the computer.
Expressions such as “a divided by b” must be written as a / b, so that all constants, variables and operators appear in a straight line. 
Parentheses are used to group terms in expressions in the same manner as in algebraic expressions. 
If an expression contains nested parentheses, the expression in the innermost set of parentheses is evaluated first.
Описание слайда:
Arithmetic expressions in Java must be written in straight-line form to facilitate entering programs into the computer. Arithmetic expressions in Java must be written in straight-line form to facilitate entering programs into the computer. Expressions such as “a divided by b” must be written as a / b, so that all constants, variables and operators appear in a straight line. Parentheses are used to group terms in expressions in the same manner as in algebraic expressions. If an expression contains nested parentheses, the expression in the innermost set of parentheses is evaluated first.

Слайд 66


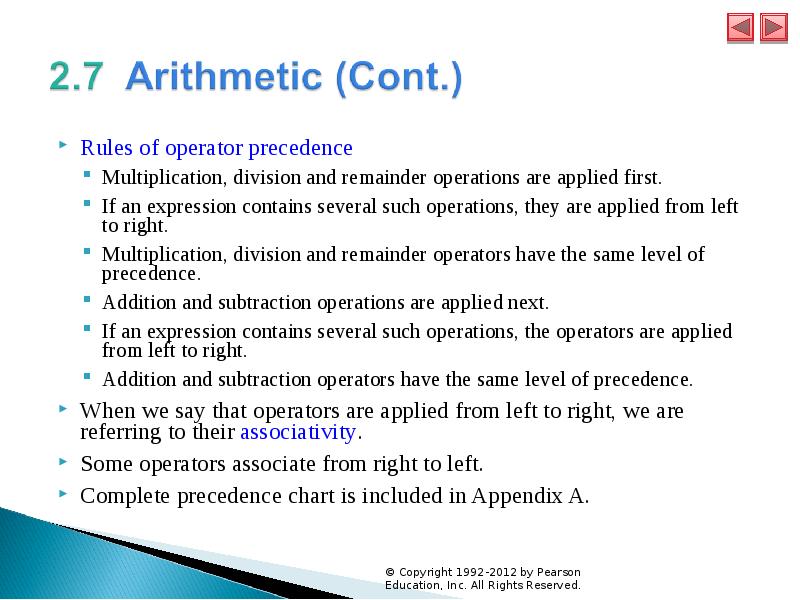
Rules of operator precedence
Multiplication, division and remainder operations are applied first. 
If an expression contains several such operations, they are applied from left to right. 
Multiplication, division and remainder operators have the same level of precedence.
Addition and subtraction operations are applied next. 
If an expression contains several such operations, the operators are applied from left to right. 
Addition and subtraction operators have the same level of precedence.
When we say that operators are applied from left to right, we are referring to their associativity. 
Some operators associate from right to left.  
Complete precedence chart is included in Appendix A.
Описание слайда:
Rules of operator precedence Rules of operator precedence Multiplication, division and remainder operations are applied first. If an expression contains several such operations, they are applied from left to right. Multiplication, division and remainder operators have the same level of precedence. Addition and subtraction operations are applied next. If an expression contains several such operations, the operators are applied from left to right. Addition and subtraction operators have the same level of precedence. When we say that operators are applied from left to right, we are referring to their associativity. Some operators associate from right to left. Complete precedence chart is included in Appendix A.

Слайд 67


Introduction to Java Applications. Chapter 2, слайд №67
Описание слайда:

Слайд 68


Introduction to Java Applications. Chapter 2, слайд №68
Описание слайда:

Слайд 69


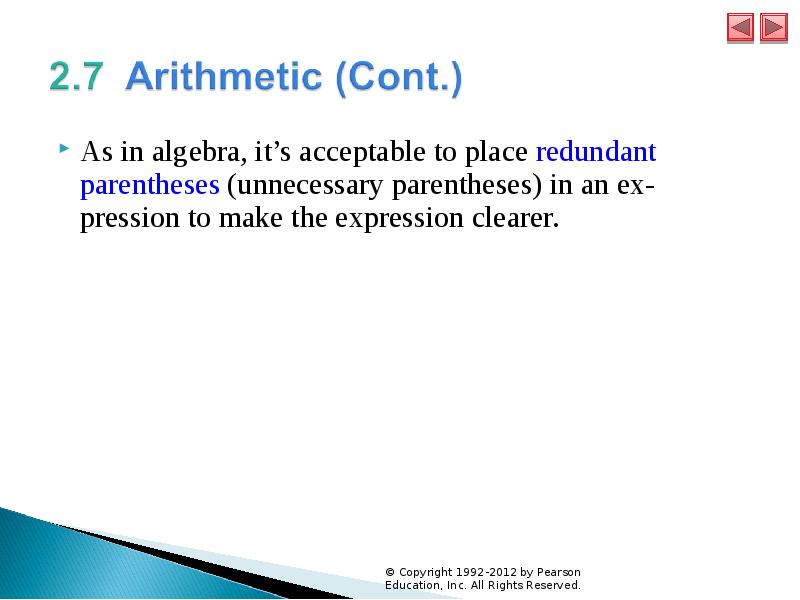
As in algebra, it’s acceptable to place redundant parentheses (unnecessary parentheses) in an ex-pression to make the expression clearer. 
As in algebra, it’s acceptable to place redundant parentheses (unnecessary parentheses) in an ex-pression to make the expression clearer.
Описание слайда:
As in algebra, it’s acceptable to place redundant parentheses (unnecessary parentheses) in an ex-pression to make the expression clearer. As in algebra, it’s acceptable to place redundant parentheses (unnecessary parentheses) in an ex-pression to make the expression clearer.

Слайд 70


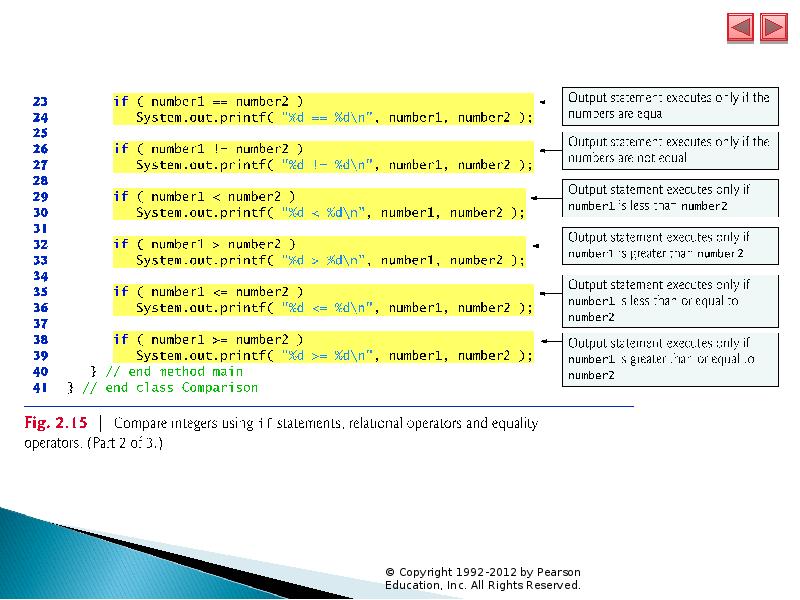
Condition 
Condition 
An expression that can be true or false. 
if selection statement 
Allows a program to make a decision based on a condition’s value. 
Equality operators (== and !=)
Relational operators (>, <, >= and <=) 
Both equality operators have the same level of precedence, which is lower than that of the relational operators. 
The equality operators associate from left to right. 
The relational operators all have the same level of precedence and also associate from left to right.
Описание слайда:
Condition Condition An expression that can be true or false. if selection statement Allows a program to make a decision based on a condition’s value. Equality operators (== and !=) Relational operators (>, <, >= and <=) Both equality operators have the same level of precedence, which is lower than that of the relational operators. The equality operators associate from left to right. The relational operators all have the same level of precedence and also associate from left to right.

Слайд 71


Introduction to Java Applications. Chapter 2, слайд №71
Описание слайда:

Слайд 72


Introduction to Java Applications. Chapter 2, слайд №72
Описание слайда:

Слайд 73


Introduction to Java Applications. Chapter 2, слайд №73
Описание слайда:

Слайд 74


Introduction to Java Applications. Chapter 2, слайд №74
Описание слайда:

Слайд 75


An if statement always begins with keyword if, followed by a condition in parentheses. 
Expects one statement in its body, but may contain multiple statements if they are enclosed in a set of braces ({}). 
The indentation of the body statement is not required, but it improves the program’s readability by emphasizing that statements are part of the body.
Note that there is no semicolon (;) at the end of the first line of each if statement. 
Such a semicolon would result in a logic error at execution time. 
Treated as the empty statement—semicolon by itself.
Описание слайда:
An if statement always begins with keyword if, followed by a condition in parentheses. An if statement always begins with keyword if, followed by a condition in parentheses. Expects one statement in its body, but may contain multiple statements if they are enclosed in a set of braces ({}). The indentation of the body statement is not required, but it improves the program’s readability by emphasizing that statements are part of the body. Note that there is no semicolon (;) at the end of the first line of each if statement. Such a semicolon would result in a logic error at execution time. Treated as the empty statement—semicolon by itself.

Слайд 76


Introduction to Java Applications. Chapter 2, слайд №76
Описание слайда:

Слайд 77


Introduction to Java Applications. Chapter 2, слайд №77
Описание слайда:

Слайд 78


Introduction to Java Applications. Chapter 2, слайд №78
Описание слайда:

Слайд 79


Introduction to Java Applications. Chapter 2, слайд №79
Описание слайда:

Слайд 80


Introduction to Java Applications. Chapter 2, слайд №80
Описание слайда:

Слайд 81


Introduction to Java Applications. Chapter 2, слайд №81
Описание слайда:


Похожие презентации
Mypresentation.ru
Загрузить презентацию